Dining section allows you to manage all your walk in orders. You can assign a table, assign a waiter, create an order from menu categories, customise it and manage payments for all these orders. For better understanding dining section can be divided into 4 sections.
Assigning a table & waiter
Step 1.
Once you log in to your Jd Omni account, from the main menu click on Dining module.

NOTE
You can also reach Dining module from Homepage>>Take Orders>>Dining.
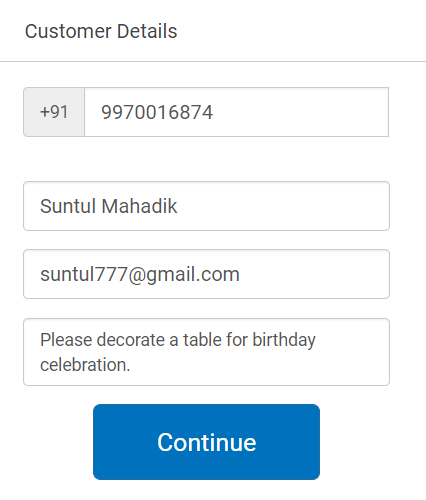
Step 2.
Enter customer details like mobile number, name, email address and any note if required.
<
NOTE
- In case you are entering customer details then mobile number & name of the customer are mandatory fields. Adding customer details allows you to view customer’s previous order and send campaign messages in future.
- In case of old customer all details will get pre-filled automatically.
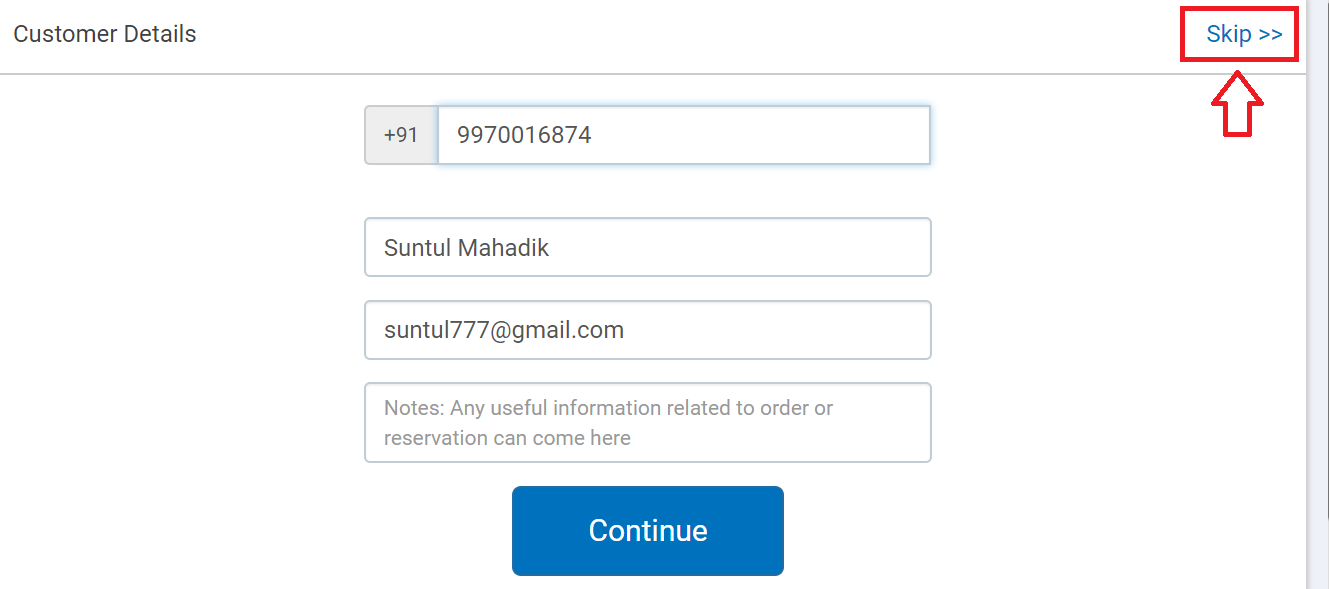
- In case you wish to bypass this step then click Skip>> option as shown below.
Step 3.
Click Continue to proceed.
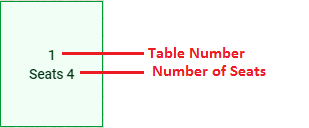
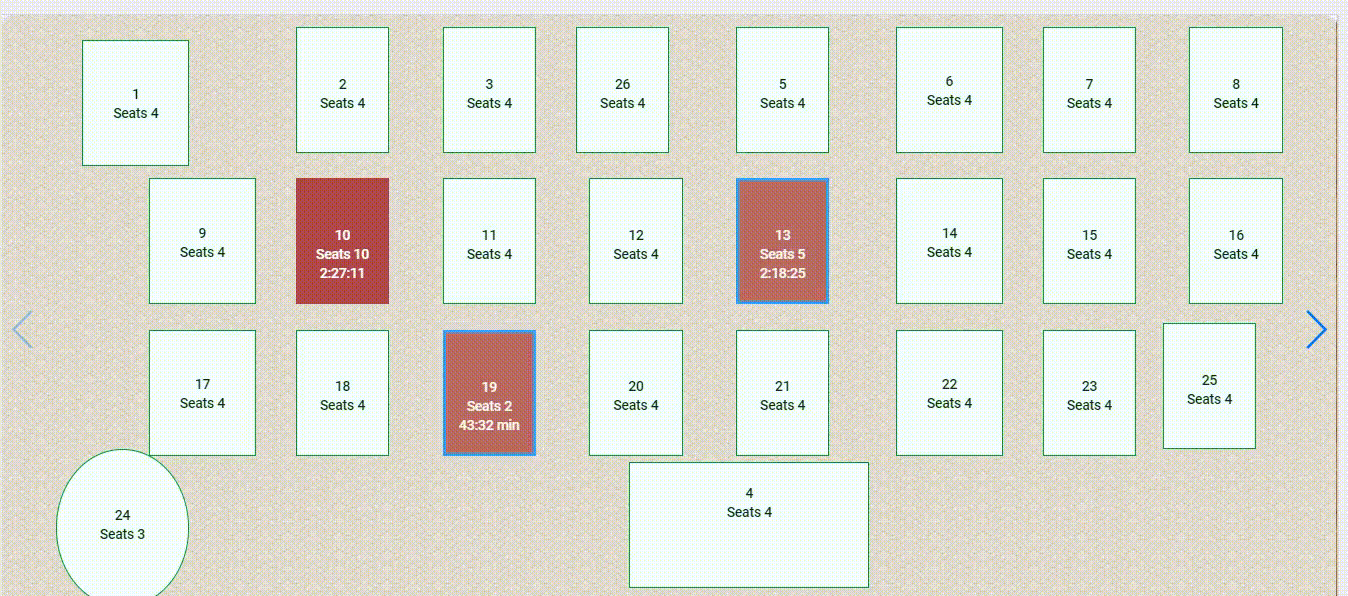
In the next modal that opens up it displays the seating arrangement of the restaurant with table number and number of seats available on that table.
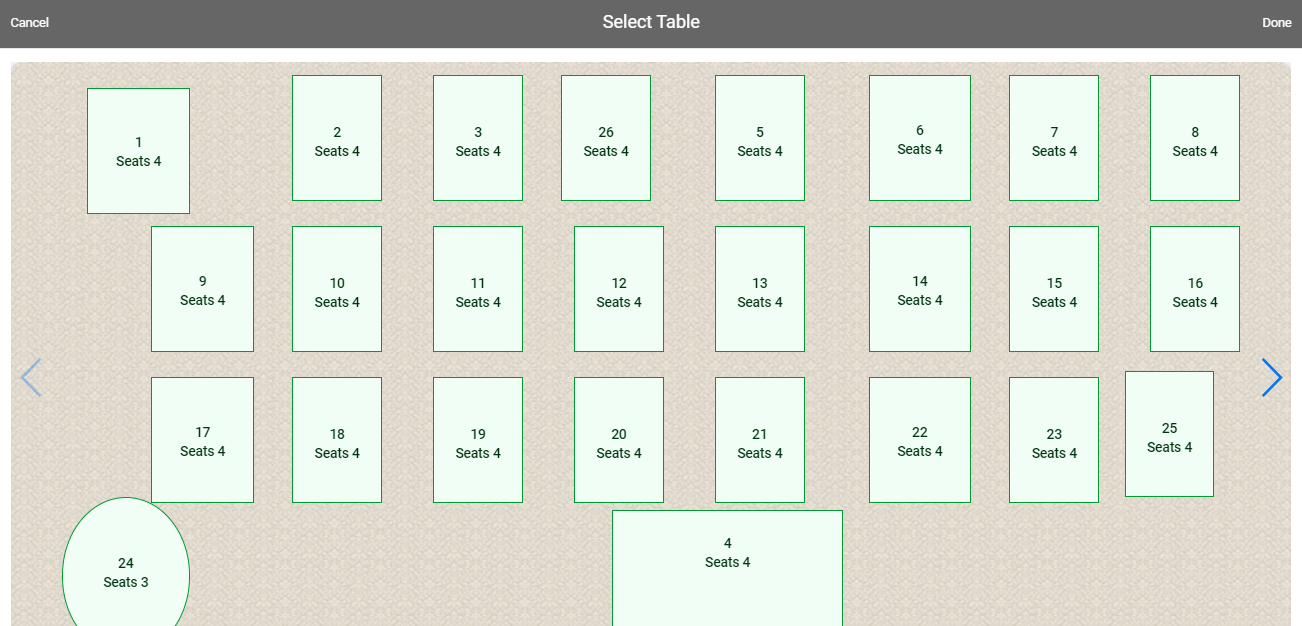
For example –
Step 4.
Click on the table you wish to book and then click Done as shown below.
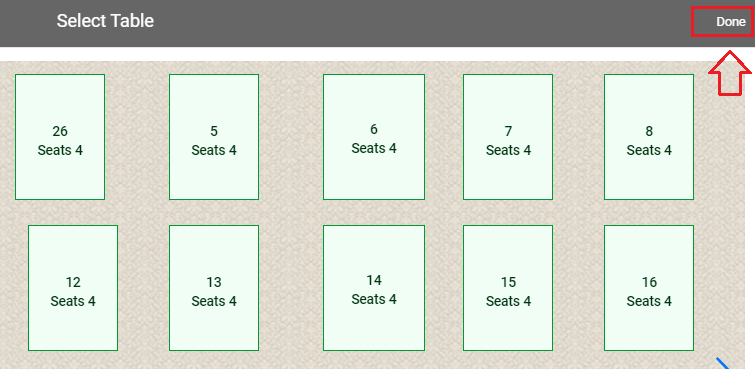
Selected table number will be displayed in Specify Tables section.
NOTE
- To book a table in different area of restaurant like first floor, second floor, bar & lounge, garden and so on, click on the area option at the bottom of the screen or
 icon as shown below.
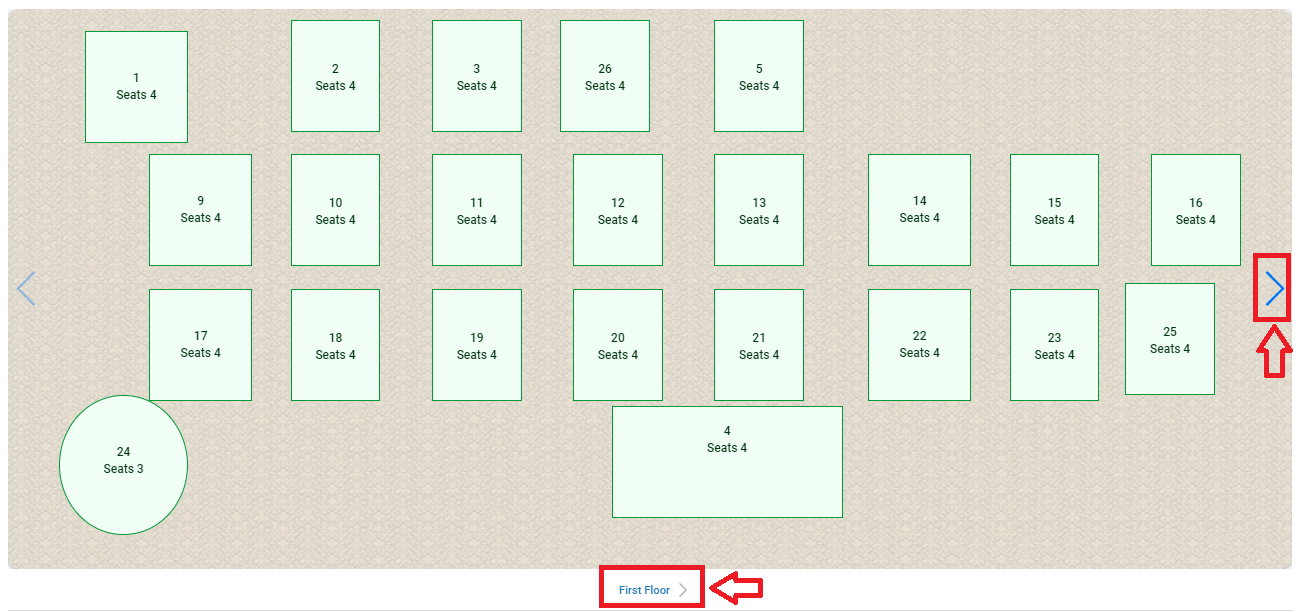
Select the area and book a table as explained above.
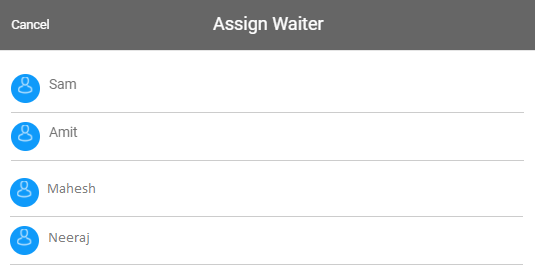
Step 5.
Click on the waiter’s name to assign a table.
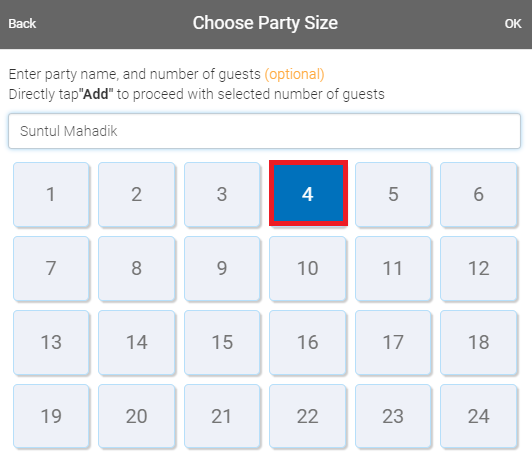
Step 6.
In the next modal that opens up, enter the name of the customer(optional) and select the number of guests.
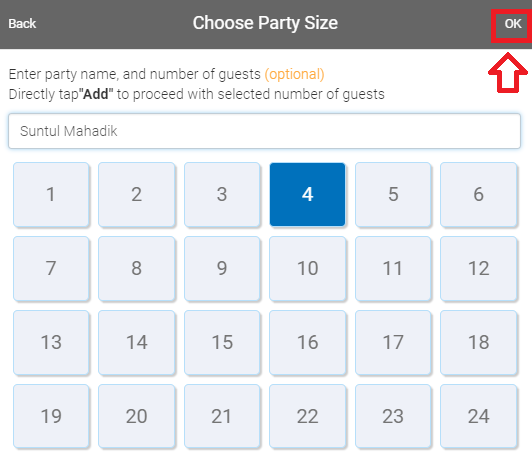
Step 7.
Click OK on top right corner to proceed.
Taking an order
In the next modal that opens up it will display menu categories on the left hand side and cart on the right hand side.
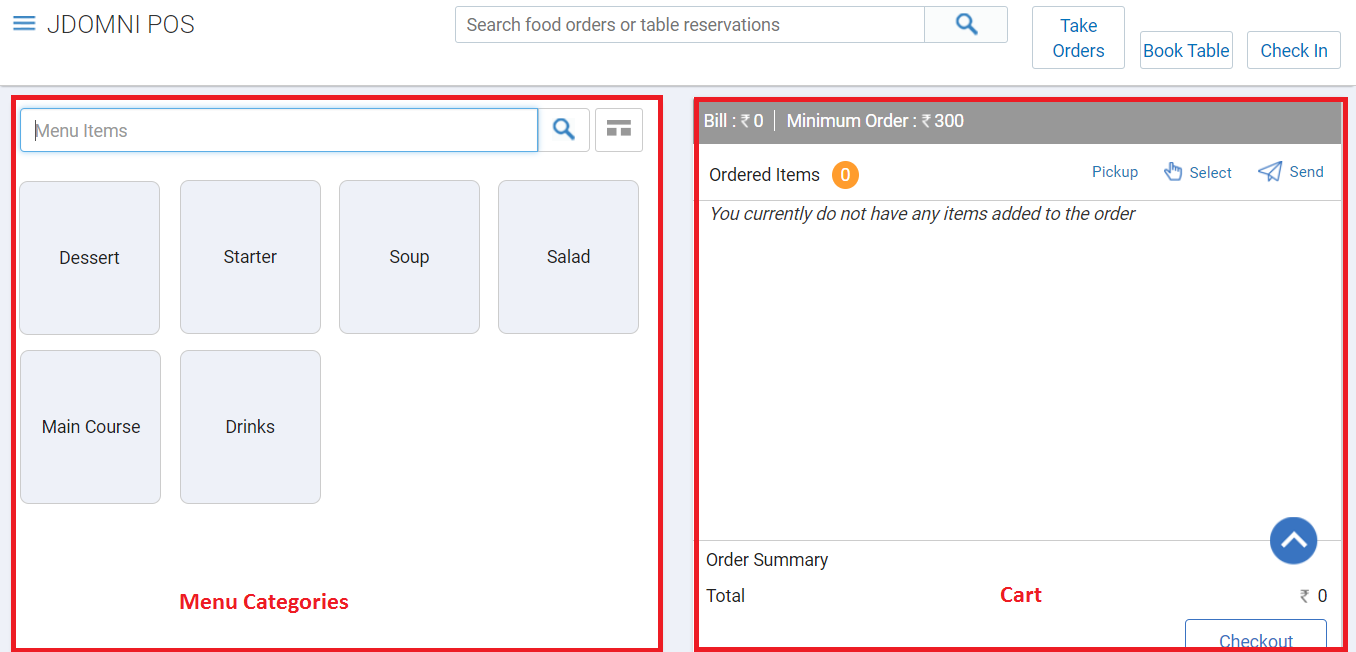
Step 1.
Click on the menu category to select an item.
For Example – Starters

NOTE
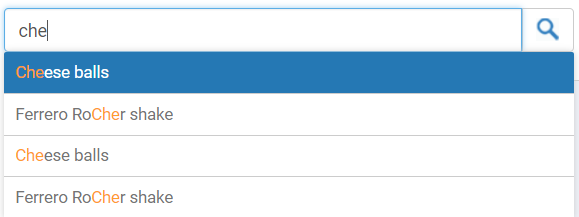
You can also search for the item by entering the name in search field.
Step 2.
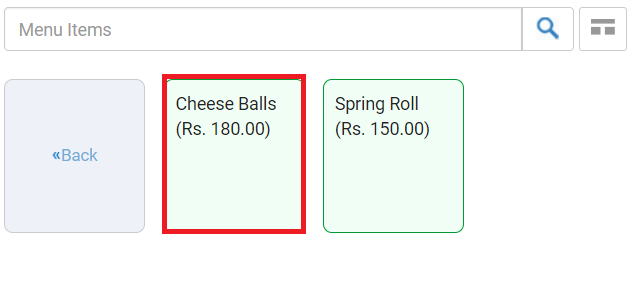
Click on the item you wish to place an order for.
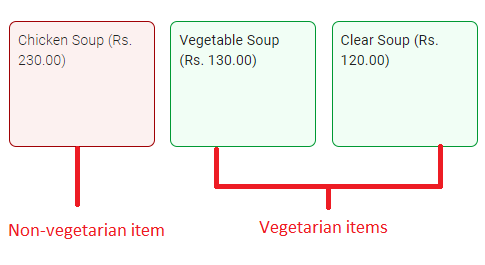
All vegetarian items will be displayed in Green background color and Non-vegetarian items will be displayed in Red background color.
Click <<Back button to navigate back to Menu Category.
NOTE
- In case you have added any modifier to this item, a modal will open up to customise your item. Click here to learn more about Modifier

Select the modifier and click Done to proceed.
Selected item will be added to the cart as shown below. Added modifier will be displayed below the item.
Step 3.
Similarly add main course, salads, desserts and other items from the menu categories to complete the order.
Editing an item
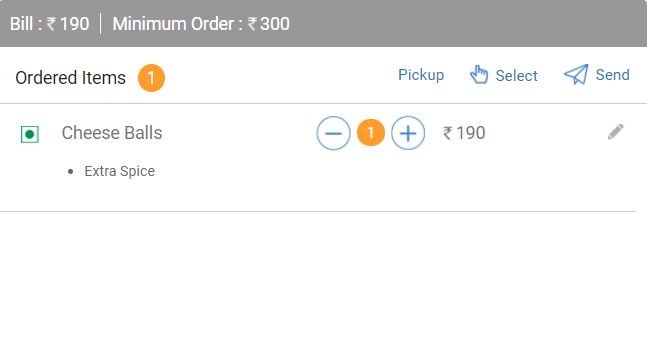
- You can also increase or decrease the quantity of the item by clicking
 &
&  icon.
icon.

- In case you wish to edit an item, click anywhere on the item name. The modal that opens up will allow you to increase/decrease quantity of order, add modifier, reorder and delete the order.

Step 4.
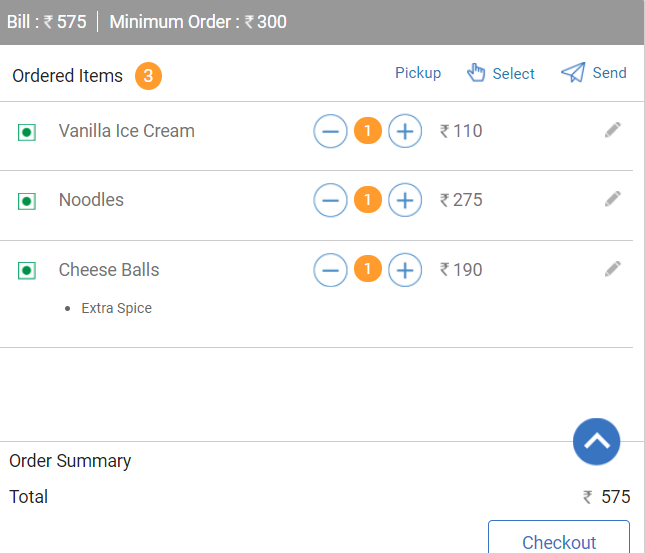
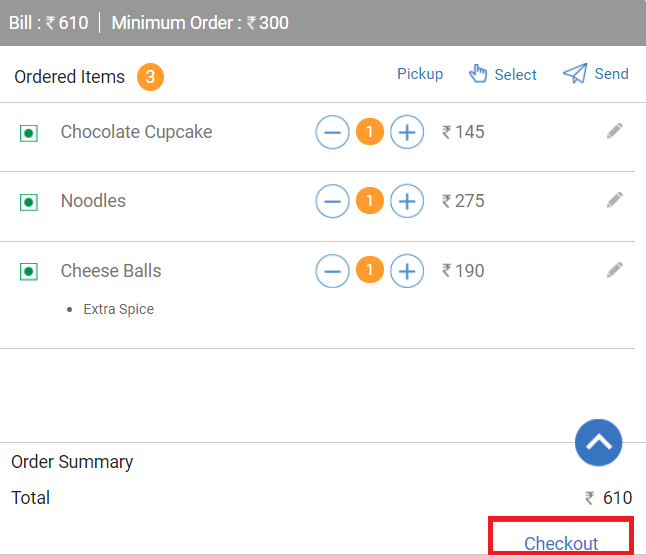
To proceed the order to kitchen click Send or Checkout as shown below.
NOTE
- Click here to learn more about Kitchen Display system(KDS).
- Once the order is ready to serve click Pick up.
- Options button at the top of cart allows you to take following actions.
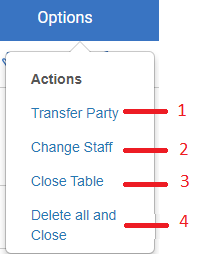
1. Transfer Party: This option allows you to transfer party from one table to another or from one area to another area of restaurant.
2. Change Staff: This option allows you to change waiter for that table.
3. Close Table: This option allows you to navigate directly to payment gateway and close the table.
4. Delete all and Close: This option allows you to delete all items and close the order. You cannot cancel an order if order has been already reached to kitchen.
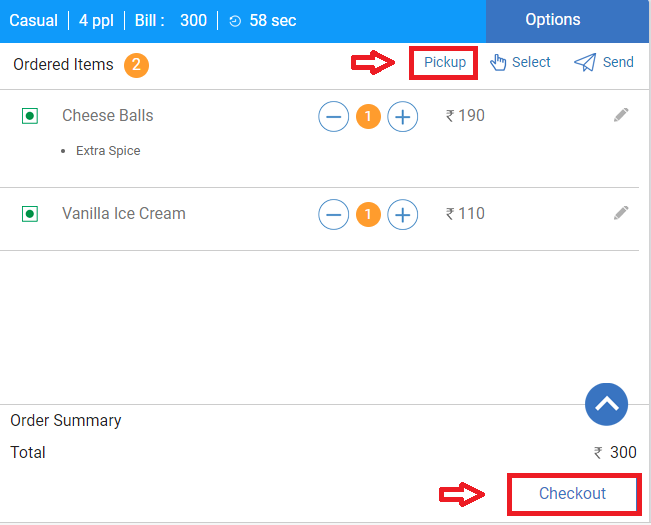
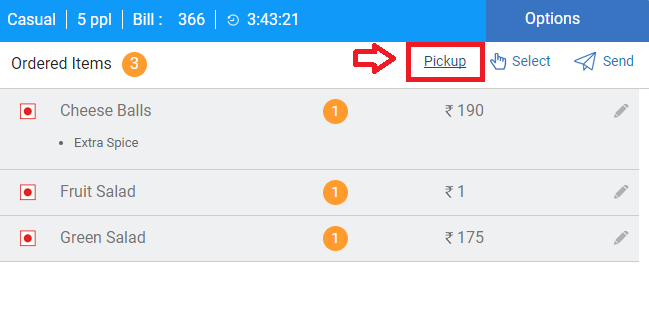
Pick up
Once the order is prepared by the chef and is ready to serve to the customer, the blinking message will be displayed on Specify Table screen of Dining module.
Click on the table number you wish to serve an order on and next click Pick Up.
Checkout & Payments
Once the customer completes his food and wish to pay the bill, click on the Checkout button to proceed.
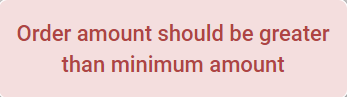
NOTE
In case billing amount is less then minimum order amount it will display following message.
In the next screen that opens up it will display complete order in detail on the right hand side and other options like payment mode, add more items option etc on the left hand side.
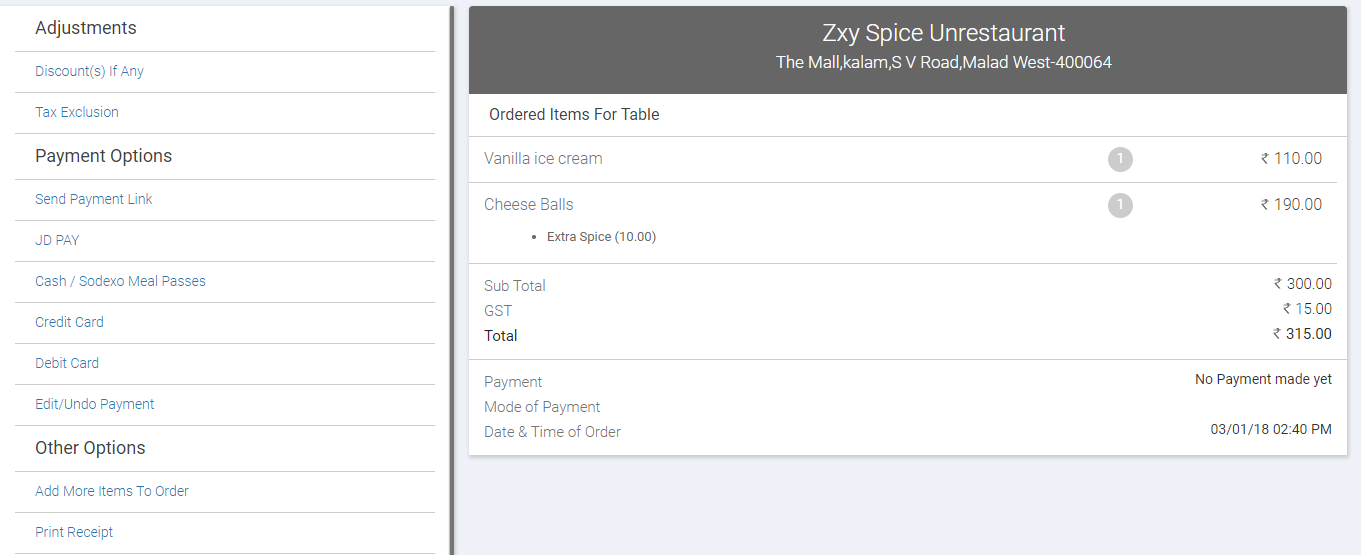
Adjustments
Discount(s) If Any: Allows you to apply discounts to the order. Learn More
Tax Exclusion: Allows you to add taxes to the complete order. Learn More
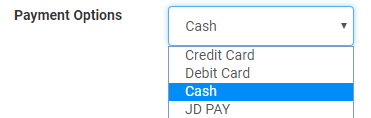
Payment Options
This sections allows you to collect the payment from customer in various way. Below mentioned are the various ways to collect the bill.
Send Payment Link: Clicking this option will send a text message with payment link to the customer’s mobile number from where he can make payment using any payment modes.
JD Pay: This option will send text message on customer’s mobile number allowing customer to pay directly from his/her JD Pay account.
Cash/Sodexo Meal passes: This option allows you to receive customer payment by cash or sodexo meal passes.
Credit Card: This option allows you to receive customer payment by credit card.
Debit Card: This option allows you to receive customer payment by debit card.
Edit/Undo Payment: Using this option you can edit or undo the payment done by you.
Customer can also pay the bill in multiple payment modes for example some amount by cash and remaining about by debit/credit card.
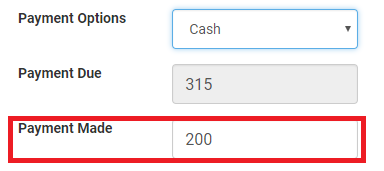
For example- The bill an order is 315 rs and customer wish to pay 200 rs by cash and 115 rs by debit card. In the payment modal. From the drop-down select CASH.

In Payment Made field enter 200 and click Pay.

Similarly pay remaining 115 rs by selecting debit card option.
Other Options
Assign Delivery Associate: Clicking this option will allows you to assign a delivery boy for this order.
Modify Address: This option allows you change or edit the address for this order.
Add More Items To Order: In case you wish to add more items to this order, this option helps you to do so.
Print Receipt: This option allows you to print receipt of this order.
Close Table Order: This option navigates you to payment gateway page to close the order.
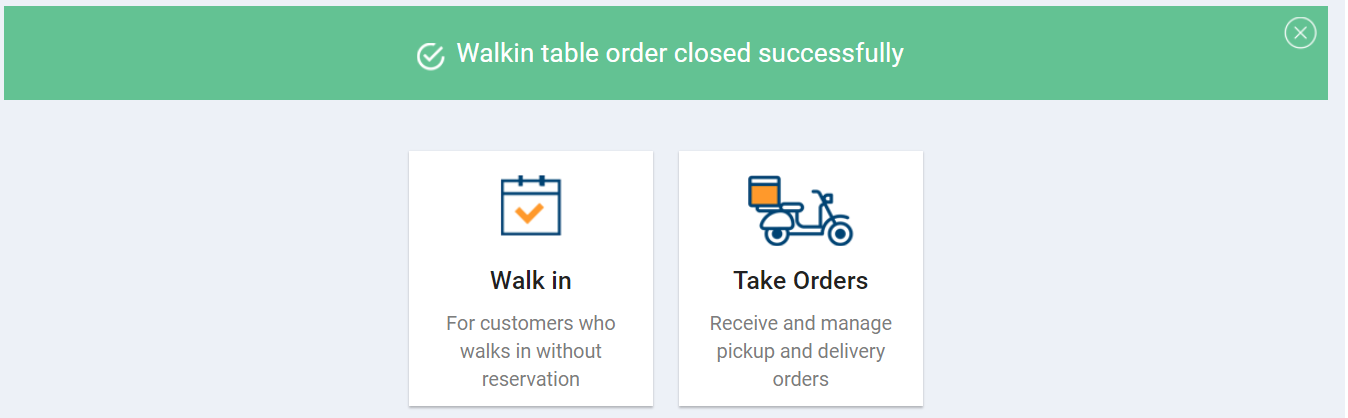
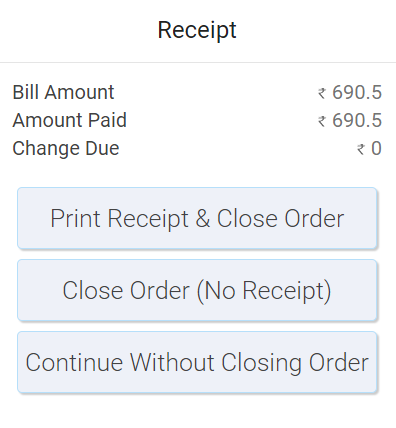
Once the payment is completed, it will show following message on the screen. Click on the option you wish to proceed with.
Once done it will display Walk In table order closed successfully message as shown below.